
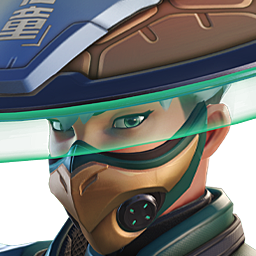
Mizuki
Win rate53.0%
Pick rate15.0%
Ban rate4.1%
Win rate since Jun 10 +1.8%
Pick rate since Jun 10 +3.6%
Aggressive mobile support who generates healing output by dealing damage through his Remedy Aura. Katashiro Return enables quick escapes; Binding Chain provides CC for dive setups.
Abilities
Spirit Glaive Bouncing projectile that ricochets off surfaces until hitting an enemy.
Healing Kasa Throws a hat that bounces between allies to heal each one.
Remedy Aura (Passive) Healing aura that scales with resource generated by dealing damage and healing.
Katashiro Return Leaps forward and leaves a paper doll; reactivate to teleport back.
Binding Chain Tethers the first enemy hit, silencing their movement abilities.
Kekkai Sanctuary Creates a protective area that instantly heals allies and absorbs projectiles.
Meta Analysis
Win Rate by Rank
Bronze 53.1%
Silver 53.4%
Gold 52.8%
Platinum 53.0%
Diamond 52.8%
Master 52.7%
Grandmaster 51.3%
Ban Rate by Rank
(as of 2026-07-26)
Bronze 1.1%
Silver 1.8%
Gold 2.9%
Platinum 4.9%
Diamond 8.1%
Master 9.5%
Grandmaster 9.4%
Win Rate by Map (All tiers) (per-map data as of 2026-07-26)
Playing Mizuki? Strongest maps: Aatlis, Runasapi, Antarctic Peninsula.
Kit fit (✓✓ … ✗✗) rates how well Mizuki's abilities suit each map's mode and geometry — independent of the observed win rates.
Map Mode Win rate ↓ ± avg Kit fit Bans
Flashpoint's scattered, drawn-out fights on Aatlis reward the self-sufficiency of Healing Kasa
Control scrums on Antarctic Peninsula are dive magnets — Binding Chain punishes every engage
On paper Flashpoint's scattered, drawn-out fights on New Junk City reward the self-sufficiency of Healing Kasa — but the numbers disagree (-1.7pp vs their average).